Showing posts with label food. Show all posts

Wednesday, April 1, 2009

Eat, Grow and Raise Rare Varieties

I was following up on one of my posts on a forum I belong to and realized that I had not yet posted this information on this blog.

The example I posted earlier about the broccoli and the fact that Idaho grows so many potatoes should bring to light one of the problems I see in agriculture today.

In the old days, farmers (including very large farms) grew a multitude of crops. People knew that they could get whatever they wanted within a short distance. But these huge Ag companies have narrowed down the varieties of what they grow. Now we have huge areas that only grow one vegetable. In fact, only one variety of vegetable. Now, what happens when a disease comes through an area? You get crops completely wiped out.

It is what happened when the blight wiped out the potatoes and caused the great Irish famine.

The same thing happened with the bananas. We began growing almost exclusively one variety of banana, the Gros Michel, a banana that was larger and, by all accounts, tastier than the fruit we now eat. A fungus called Panama disease began infecting it and by the 60's it was virtually wiped out. Now what we think of as the banana is actually a second rate replacement called the Cavendish. If it happens again, the third variety down the line is a pretty poor substitute. And, in 1992, a new strain of the fungus, one that can affect the Cavendish, was discovered in Asia and most experts agree that we have major problems coming. We may not have bananas as we know them in ten years.

Because of these giant Ag companies taking over our food supply we are losing varieties of fruit, vegetables and farm animals at alarming rates.

Here are some examples:

96-98% of the commercial vegetable varieties available in 1903 are now extinct.

Reliance upon modern varieties of rice caused more than 1,500 local rice varieties in Indonesia to become extinct.

In the USA, only 5% of the apple varieties that existed 200 years ago still remain.

In the UK, 90% of vegetable varieties have disappeared over the last century.

99% of all turkeys raised in the U.S. are Broad-Breasted Whites, a single turkey breed specially developed to have a meaty breast.

83 percent of dairy cows are Holsteins, and five main breeds comprise almost all of the dairy herds in the US.

60 percent of beef cattle are of the Angus, Hereford or Simmental breeds.

75 percent of pigs in the US come from only 3 main breeds.

Over 60 percent of sheep come from only four breeds, and 40 percent are Suffolk-breed sheep.

The less varieties we have of all of our food the more of a chance that we can have them wiped out by disease or by climates that they are not meant to be grown in. The varieties being lost were developed in micro climates and were able to thrive. When we try to grow the same variety everywhere we are looking for trouble.

So, buy heirloom varieties when growing your garden. If possible pick wacky varieties that are at risk of extinction. Keep them alive. We are all part of the solution.

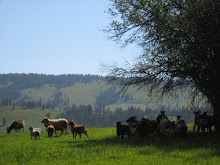
On our place, every variety of vegetable in my garden is an heirloom and our sheep, horses and chickens are all rare breeds.

Do what you can and can what you do.

Sunday, March 29, 2009

Artisan Bread in Five Minutes a Day

I good buddy of mine just sent me this link to an instructable he made on "Artisan Bread in Five Minutes a Day: The Discovery That Revolutionizes Home Baking".


It looks great, and I'll be trying it out in the next couple of days. Let me know if any of you give it a try and how it turns out.


http://www.instructables.com/id/Artisan_Bread_in_Five_Minutes_a_Day/?ALLSTEPS#step0

Wednesday, March 18, 2009

Zeer Pot Refridgerator


If you haven't seen these Zeer Pot's, you should check them out. Especially if you are in a really hot climate. I've known about these for awhile now, but I've not had the need to use them as I am in a colder climate.
Basically it consists of one earthenware pot set inside another, with a layer of wet sand in between. As the moisture evaporates, it cools the inner pot, keeping produce fresh for up to three weeks.
Here is a link to a site that explains them a little more.

I think that this is just good knowledge to have in your head in case you ever find yourself in a situation where one of these would come in handy. And I'd bet that there are certain areas of Idaho where these would work really well.

Monday, March 16, 2009

Apple Tree From Seed

After eating an apple about a while back I decided to save the seeds and grow a tree. I know that almost all apple tree's are grafted nowdays. So if I use seeds from one of these apple's, I will most likely not get the same type of apple tree as the apple that I got the seed from.

However, there is a really, really old orchard on our place from the original homestead. I enjoy these apples and I think that they should produce the same tree if I take the seeds from these.

Unfortunately, there are no apples on the tree at the moment and anything on the ground is covered in a few feet of snow. So for my experiment, I am just going to use some fuji apples that I got form Azure Standard. Later I will get some of the old orchard apples and use them.

So, after researching the best way to sprout the seeds on the internet, I decided to try three different approaches.

1. I planted 12 of the seeds in some potting soil after letting them soak for about two weeks.
2. I placed 12 seeds in a wet paper towell in the refridgerator.
3. I placed a bunch of seeds in a glass of water and let soak until sprouted.

Some of these seeds in each method were dried out for a few weeks first. Unfotunatley, I mixed them with one's that were not dried out first and now I'm not sure which were which.

I did not have any luck with the first two methods. But, by allowing the seeds to soak in water I was able to finally get a few of them to sprout. I had been changing the water in the glass whenever it would get really dark. I'm not sure if this helps or hurts the process.

Once I had two seeds that were sprouting well (I think they had a sprout about 1/8 of an inch), I planted them in potting soil. I added some water and then left them alone. After a few days, I noticed that one of them was actually coming up. So, it looks like I may actually be able to grow this thing. I will keep updating this little project.

Unfortunately by growing a tree this way, I will have to wait quite a few years to see any fruit. But it is more about gaining the knowledge and having the experience. And hopefully I will be able to enjoy some nice apples some day.

Monday, March 9, 2009

Chart - How Much Food to Plant

This is a link to a great chart that breaks down how many of each vegetable you would need to plant, in order to feed a family of four for a year.

http://1.bp.blogspot.com/_DnyLywo1Fts/SZRimqm048I/AAAAAAAAG1U/605g0AXs10w/s1600-h/garden%2Bplanner%2Bimage.jp

Thursday, March 5, 2009

Food for Thought

The average food item on Americans plates have traveled somewhere between 1,500 miles and 1,800 miles.

If every American were to eat just one meal a week that was organic and local, we would save more than 1.1 million barrels of oil a week.

The U.S. supports about 30 million acres of lawn. It is the largest crop our country produces.

A gas powered push mower emits as much pollution in an hour as 11 cars.

We spend about $8.5 billion a year on lawn care products and equipment.

If we want to become self-sufficient, lets begin by spending less time, energy and money on our lawns and shift it towards something we can use, like a garden. If you water it you should be able to eat it.

By producing some or all of our own foods, not only are we getting fresher, tastier, healthy food, but we are also saving a massive amount of resources.

Like I said, just a little food for thought. Think Globally-Act Locally


These facts come from two books I'm in the middle of at the moment. "the urban homestead" and "Animal, Vegetable, Miracle". Both great books that I'd recommend.

Friday, February 20, 2009

The Three Sisters

"In late spring, we plant the corn and beans and squash. They're not just plants- we call them the three sisters. We plant them together, three kinds of seeds in one hole. They want to be together with each other, just as we Indians want to be together with each other. So long as the three sisters are with us we know we will never starve. The Creator sends them to us each year. We celebrate them now. We thank Him for the gift He gives us today and every day." - Chief Louis Farmer (Onondaga)

The "Three Sisters" method is a form of companion planting using corn, beans, and squash. Although this method originated with the Haudenosaunee, these three have been planted by many traditional Native American gardeners throughout North America.

The beauty of this method is that each vegetable benefits from the others. Corn gives the beans a place to climb, the beans provide nitrogen to the corn roots and the large squash leaves provide shade and living mulch which helped to deter weeds and hold moisture in the soil.

To begin, you need to make mounds to plant the corn in. They should be about 1 1/2 feet across on the top. The center of each mound should be 5 feet apart from the center of the next. The mounds should be staggered in adjacent rows, making up an area at least 10 ft. by 10 ft. This will ensure that the corn pollinates properly. First, plant four corn seeds in a diamond on top of the mounds. They should be about 6" apart.

When the corn is about 4" tall, you can plant the beans and squash. Plant the beans in a square shape in between the corn.

Build your squash mounds the same size as the corn/bean mounds. Build them in between each corn/bean mound. Plant 3 squash seeds, 4” apart in a triangle in the middle of each mound. Once these squash seedlings emerge, you can thin them to two plants per mound.


This diagram is from http://www.reneesgarden.com/

Monday, February 16, 2009

Animal, Vegetable, Miracle

I have not had a chance to read the book, "Animal, Vegetable, Miracle", but I've heard from several friends that it is a must read. I will let you know how it is when I am done. But if you can't wait, feel free to check it out.

"Part memoir, part journalistic investigation, this book (released May 2007) tells the story of how our family was changed by one year of deliberately eating food produced in the place where we live. Barbara wrote the central narrative; Steven's sidebars dig deeper into various aspects of food-production science and industry; Camille's brief essays offer a nineteen-year-old's perspective on the local-food project, plus nutritional information, meal plans and recipes. "

http://www.animalvegetablemiracle.com/index.html

Homegrown Revolution

I wanted to share this short video, "A Homegrown Revolution". For those living in the city, this video should be an inspiration. There is no reason that we can't all have our little homesteads.

http://www.youtube.com/watch?v=mCPEBM5ol0Q&feature=related

True freedom is the ability to grow what you eat. It's possible. I hope we can all make the effort.

Thursday, February 5, 2009

Source of Quality Bulk and Natural Foods

While looking for the cheapest way to get bulk wheat, I came across a company out of Oregon called Azure Standard. They had the cheapest bulk hard red wheat I could find at the time. It is about $30 for a 50 pound bag. I soon learned that they were not only the cheapest place I could find bulk wheat, but they were an amazing source of all kinds of natural foods.

They specialize in natural, organic, earth-friendly foods and products. And the best part is that they deliver directly to customers by semi truck and UPS. To have an order that weighed over 300 pounds delivered to a drop off point near me was a total of $8.

I know they have a Boise warehouse that they deliver out of. From the warehouse they have route #1A which makes deliveries through Meridian, Caldwell, Parma, Nampa, Eagle, Middleton and Star. Route #2A makes deliveries throughout Boise. And route #3A will deliver along a loop on Hwy 95, north through Fruitland all the way to New Meadows. Up Hwy 55 North to Riggins. Back South to McCall, and on to Emmett.

They also make truck deliveries along I-84 from Oregon down through Twin Falls. On I-90 between Ellensburg, WA and Missoula, MT. And on Hwy. 95 from Lewiston to Bonners Ferry.

They deliver to many other parts of the country as well, but I believe that covers the truck routes in Idaho. You could, of course, have them use UPS if you are not near one of these routes.

So, take a look at some of the great things they have. I highly recommend them. Their organic produce is a lot cheaper than we can get in our mountain town. Their grain was about the cheapest I could find without getting it straight from an elevator. And they have a huge variety of products.
http://www.azurestandard.com/

Here is a link to the minimum orders required.
http://www.azurestandard.com/policies.php#minimumOrders

I hope you enjoy.

Monday, February 2, 2009

Using Buckets for Long Term Storage

One of the cheapest and easiest ways to store food long term is with a food grade bucket. These are usually five gallons, but can come in four or six gallons as well as many other sizes.

You can find these buckets on many food storage or emergency preparedness site's. Of the the cheapest I have found were at Emergency Essentials. But, I beg you not to waste your money on a new bucket. There is a secret to getting as many buckets as you want for free (or very inexpensive). Just call around to some local bakeries. Their flour, spices, sugar, filling and many of their other ingredients usually come in these buckets. Because of this, they end up with a bunch of empty buckets laying around.

The first place I ever called gave me twenty for $1 a piece. Now, if we call around, we are sure to find someone that will give us them for free.

The Bucket - Make sure that when you get a bucket it is food grade. One trick is to look on the bottom of the bucket. It should have a triangle with the #2 in it. It should also have "HDPE", which stands for High Density Polyethylene. This is the only material food grade buckets are made from. If your buckets are not food grade, they can leach chemicals into your food over time.

The Lid - The lid should have a rubber gasket that goes around the inside of the lip. This will ensure an airtight fit.

The Process - There are several standard ways to seal the food in. The first is to use a mylar bag and an oxygen absorbing packet. Place the bag into the bucket and a oxygen absorber into the bag. Fill the bag with your grain or other food item. Fill to about 80% of volume. At this point, some people add bay leaves to deter little bugs. You can also toss in a moisture packet, but this isn't a must. Then seal the bag with an impulse heat sealer or an iron. Make sure the seal is a good one and air tight. Add your lid and store.

I do not use this method myself. This method is intended for storing food for 10 + years. I am a strong believer in using what you have and having what you use. This means using your food and replacing it. Because of this, I do not have a reason to store my food for more than 5 years. Therefor, for many of my buckets I do not do anything besides put the lids on. These are the buckets that I get into somewhat frequently (let me just add here that a nice bucket opener is a good thing to have). For the items that I won't be getting into any time soon, I use dry ice to seal the buckets.

Place one ounce of dry ice for every gallon (five gallon bucket = five ounces of dry ice) into the bottom of the bucket. Pour grain over the ice (you can also add a paper towel, or something similar, if you don't want the food to possibly get burned from the cold). Leave about an inch at the top. I add a few bay leaves. Then slide the bucket over the top, but don't seal it. When the bottom of the bucket starts to warm up, you can seal the lid. Watch it every 10-15 minutes to make sure the bucket doesn't start to bulge. If it does, burp it (open the lid to let the gasses out).
I add some packing tape to the lid and write with a sharpie the date I sealed it and what food item is inside. Now store and enjoy in a few years.

Keep in mind that the best place to store these buckets are in a cool, dark, dry location that is safe from bugs and rodents. For every 10 degree drop in temperature, they say that it doubles your storage life.

Good luck and enjoy.